
Fog, ditch or rear: one cube, three different jobs
Same lamp, same 40 watts, three positions on the vehicle. Each one wants a different beam pattern, a different cover and a different way of wiring the halo — and the position is the decision that sets the other three.
A 3-inch cube fits almost anywhere on a 4WD. That is the appeal, and it is also why it ends up in the wrong place more often than any other lamp on the vehicle.
Three positions account for nearly all of them: the fog light pocket in the bumper, the A-pillar (a ditch light) and the rear. Same 40W, same 3,200 lumens, three completely different jobs. Each one wants its own beam pattern, its own cover and its own wiring, and none of that can be decided until you know where the lamp is going.
So pick the position first. The specification follows from it.
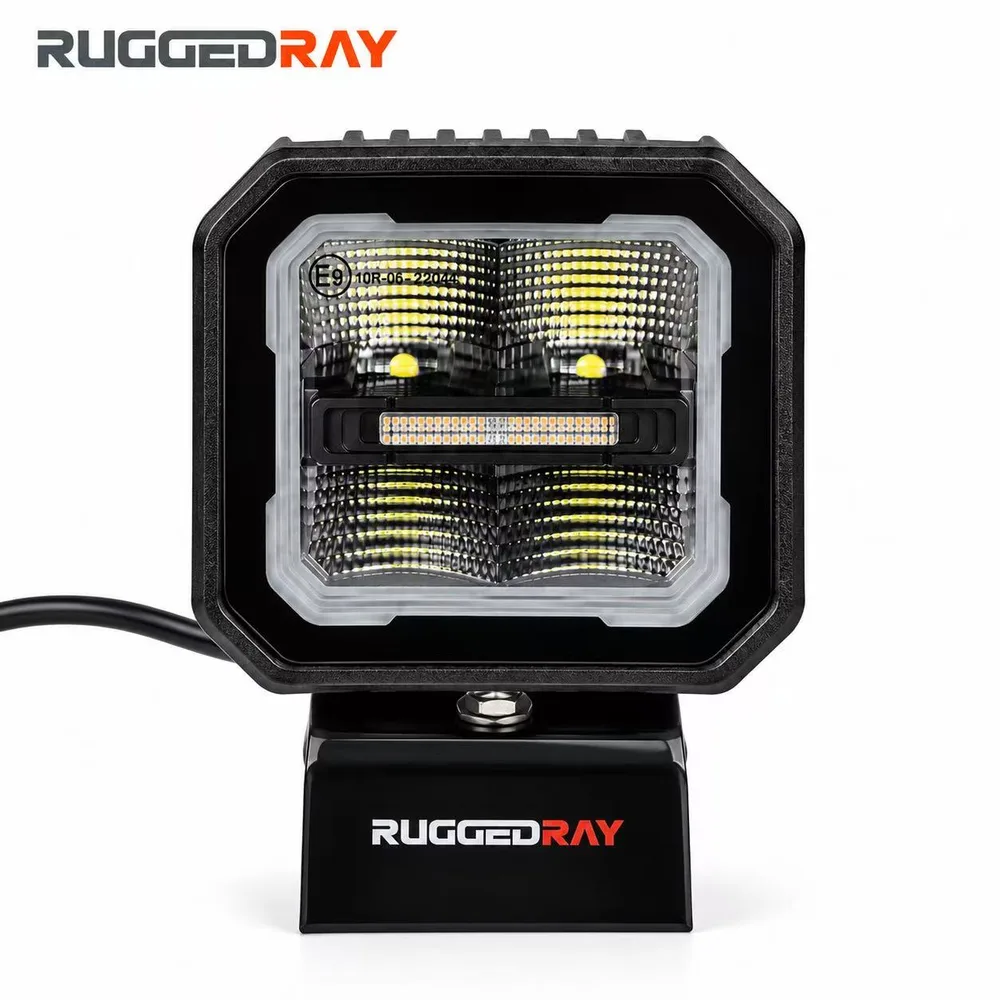
The lamp in this article is the TC-W40C, a 3-inch square cube with a halo that runs white or amber. Everything below works the same way for any cube of that size. The halo and the clip-on covers are what give this one a part to play in all three positions rather than one.
Aim angles, before the argument starts
Numbers first, because every section below refers back to them. Treat all of them as a starting point and fine-tune on the vehicle: ride height, bumper shape and how you actually use the truck all move them.
1. The fog light pocket
The factory pocket low in the bumper, or the lower face of a bar if the pocket is gone.
Low is the whole point. A lamp sitting near the road surface throws a flat beam along the ground instead of up into fog, dust or falling snow, and what comes back at you is road rather than glare. Mount the same lamp high on the bar and you have thrown that away.
Aim. Keep the bottom edge of the lamp at least 250 mm off the ground. Two to three degrees down off level, and both lamps parallel. Do not splay them outboard. You are lighting the road surface, not the eyes of the driver coming the other way.
Beam pattern. Diffused first choice, flood second. A flat wide spread is much closer to what a fog lamp actually does than anything with reach in it. Spot belongs nowhere near this position.
Cover. Amber for fog and dust, yellow for rain and snow.
Halo. ACC, or tap the vehicle’s own parking light circuit. Key off, halo out. Not constant power: see the wiring rule further down, which holds for all three positions.
Main beam. Its own circuit through a relay. If you want it to behave like a fog lamp, interlock it with low beam and cut it when high beam comes on.
The pitfall. The lowest edge of the bumper is exactly where the front wheels throw grit, and a lens down there gets sandblasted. Hazed after the first serious sand trip is a normal outcome, not a defect. Mount as high in the pocket as the pocket allows, and run an amber or yellow cover as a sacrificial layer. A scuffed cover is a cover, not a lamp. Order a spare and get on with it.
2. The A-pillar, as a ditch light
Up at the base of the windscreen, on the hood hinge bolts. The lamp’s own bracket does not reach that far: you want a vehicle-specific hood hinge bracket, which bolts to holes that are already there and means no drilling. They are widely available for the common utes and wagons.
What a ditch light is for is not down the road. It is the verge, the ruts, the edge you are about to put a wheel over, and whatever is coming off the bank at you. High and outboard is what buys that, and it is the only reason the position exists.
Aim. Twenty-five to thirty-five degrees outboard, about ten degrees down. That lands the useful part of the beam on the verge and on the ground 10 to 20 metres ahead of the front wheel.
Beam pattern. Combo. The spread covers the verge, and the centre keeps enough reach that the lamp is still doing something at speed.
Cover. Run it clear. The black cover earns its keep on a parked vehicle, when you would rather the lamp were dark than working.
Halo. ACC or the parking light circuit, same as the pocket.
Main beam. Its own circuit, its own relay, its own switch. Ditch lights get used independently of everything else on the front of the vehicle, which is the argument against sharing a circuit with the fog pair.
The pitfall. With the bracket on the hood hinge bolts, a lamp set too far inboard fouls the wiper arm or the edge of the bonnet, and you find that out when you next open it. Open and close the bonnet twice (fully, slowly) before you torque anything down.
3. The rear
Rear bar, tub rail, the back edge of a rack, or a canopy.
This one is not a driving light and should not pretend to be. It is for reversing onto a site, lining up a hitch, setting up camp in the dark and working on the vehicle. Reach is not the job — a usable pool of light behind the truck is.
Aim. Fifteen to twenty degrees down and back. Cover the ground from the rear wheel out to three to five metres behind and you have it.
Beam pattern. Flood.
Cover. Clear normally. Amber earns a place if you work in dust.
Main beam. A work light, on its own circuit and its own switch, used parked. Do not tie it into the reverse circuit.
Halo. Reverse circuit only, or its own switch used parked. Never constant power, and here the reason is not preference. A white lamp facing rearward, lit while the vehicle is moving, is not permitted in the United States, the EU, the UK or Australia: white to the rear is the reversing lamp, and it lights only in reverse. Amber left on constant to the rear brings its own problem: it reads as an indicator or a hazard flasher to the driver behind you. Confirm it against your own market’s rules before you commit the loom either way.
The pitfall. The common mistake is wiring the main beam into the reverse circuit because it looks tidy on paper. Then you hitch a trailer, select reverse, and 40 watts goes straight into the trailer’s front board and back out at your mirrors. Give the main beam its own switch. On the reverse circuit, the halo on its own is plenty.
Spot is not on this list
Nothing above asks for a spot beam, and that is deliberate. Spot belongs on the roof and on top of the bumper, where the job is distance and there is nothing in the first 20 metres worth lighting. Put a spot in a fog pocket and you get glare back off the road. Put one on an A-pillar and it shoots straight past everything the position exists to show you.
Which optic does what (and why two lamps at identical wattage and identical lumens can land 65 metres apart) is worked through in spot versus flood beam patterns.
The three covers
Black, amber and yellow, and they clip on over the same lamp.
- Amber. Fog and dust.
- Yellow. Rain and snow. Selective yellow, for the same reason rally cars have run it for decades.
- Black. For a parked vehicle, when you would rather the lamp were dark.
The cover being a separate part is the useful bit. It is the thing that takes the abrasion in the fog pocket, and it is a part you can replace without touching the lamp.
One rule for the halo, and it is a wiring rule
No halo on constant power, in any of the three positions.
Front and A-pillar halos go to ACC or to the vehicle’s own parking light circuit, so the key turns them off. Rear halos go to the reverse circuit, or to a switch you only use parked.
The halo is an accent light. Wire it to something that switches and it stays an accent light. Wire it to constant power and it becomes a lamp that is lit when you are not there, on a circuit nothing supervises, in a position that may not be legal to run lit in the first place.
Three positions, three circuits
Count what that adds up to. Fog pair on one circuit, ditch pair on a second, rear on a third, plus the halo feeds, and that is lighting alone, before the compressor, the fridge, the winch and the rock lights that turn up next.
This is where builds go wrong, and they go wrong at the switching rather than at the lights. Three separate lighting circuits, each wanting its own switch and a fuse sized for it, on a vehicle with one accessory socket and a dash with nowhere to put anything. A switch panel is what makes the third and fourth circuit a five-minute job instead of a rewire, and sizing one by total current rather than by switch count is the part most people get backwards, which is worked through here.
Do the switching first if you can. It costs less to plan eight circuits and use four than to plan four and need eight.
What the lamp brings to it
The TC-W40C is a 3-inch square cube, 40W, 3,200 lumens, with a halo that runs white or amber and clip-on covers in black, amber and yellow. The beam pattern is specified with the order (spot, flood, combo or diffused), which is what lets one part number go into all three positions on the same vehicle with the right optic in each.
It is E-Mark approved to ECE R10. That is the electromagnetic compatibility regulation: it covers how the lamp behaves electrically on a vehicle, and nothing else. It is not a photometric approval, it does not cover the beam, and it does not make the lamp road-legal as a driving light in any market. What the approval covers and what it excludes is set out in full on the product page, and we would rather you read it there than take a mark on a lens as a blanket answer.
Past that, the pattern, the halo colour and the cover are chosen against the order, and the same lamp goes out under customer branding for the people who ask; private label and OEM work here the way they work on everything else we build. Tell us the position on the vehicle and the market it is going to, and we will tell you which pattern and which cover, or say plainly when the answer is a different lamp from the range.